When I first heard about Windows Subsystem for Linux (WSL), I got excited. I hadn't used Windows for development in years. Configuring Node and Ruby on Rails in Linux or on a Mac was easy; so I didn't have much impetus to switch. I'd also heard of how Rails didn't run well on Windows, so I didn't bother with it. I've ran a few things in cygwin years ago. I dabbled with Git Bash, but the emulation there didn't capture my attention.
I started my web development career using both Mac and Windows. Node and npm didn't exist yet. Most of the static web content I build relied on jQuery or Flash. Back then I used Smultron or TextWrangler on the Mac and Notepad++ in Windows. Then I moved to Aptana Studio as it worked on Mac, Linux and Windows. This was followed by Brackets, then Atom, and today I use VS Code. In fact, Visual Studio Code integrates with the Windows Subsystem for Linux quite well and there's an extension to support it.
I'd used a MacBook Pro for almost three and half years, but it was in dire need of replacement. So back in October, I purchased a Razer Blade Stealth and took a stab at using WSL on it. Unfortunately, with WSL version 1, I ran into issues that hadn't been ironed out yet. Its also possible that I set something up incorrectly at the time. Either way, after getting both Node and Ruby on Rails installed, I ran into odd errors and warnings when I set up sample projects. As a result, I gave up on the endeavor and installed Ubuntu.
Ubuntu ran rather well except for a few bugs that might have been related to the graphics card driver. The screen wouldn't always wake properly after the machine went to sleep. As fate would have it, I also ended up needing to connect to a client's VPN that would only work on Windows and Mac. So Windows got reinstalled. I was able to quickly get Linux running in a virtual machine, and that carried me through the end of the project.
There were a few things I didn't like about depending on a virtual machine in my default development workflow.
-
Memory Usage One key issue I faced was that running two operating systems simultaneously takes up a lot of your computer's memory. Things ran rather slow. I was able to mitigate this by running Kubuntu, and could have tried any number of Linux distributions optimized to use fewer system resources.
-
Display Scaling The second issue I faced is that running Linux in a virtual machine on a 4K monitor didn't scale all that well. Windows applications scaled fine. I didn't have the time to dig into solutions, so I set the display to a lower resolution and went about my work.
-
Context Switching This was more of an annoyance, but constantly switching between a Linux and Windows mindset felt odd. Especially when I'd find myself using a system wide keyboard shortcut in the wrong environment. I'd also find myself not remembering if a browser tab was open inside the virtual machine or Windows.
So over a month ago I took the plunge and tried out the latest slow release build of Windows 10 Version 2004, which includes Windows Subsystem for Linux version 2.
Signing up for the Windows Insider Program
Currently only the first version of WSL can be installed in retail builds of Windows. In order to install WSL2 today you will need to join the Windows Insider Program and switch your builds to Slow releases. Once Windows 10 Version 2004 is released, however, you won't need to be part of the insider program to use WSL2. If you'd like to compare the difference between WSL 1 and WSL 2 go here.
Configure your computer for Slow builds
-
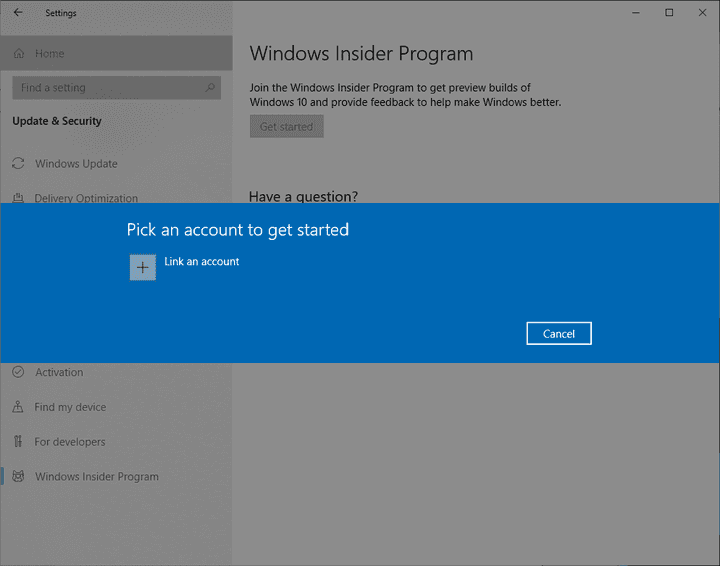
Go to Settings > Update & Security > Windows Insider Program.


-
Click Get Started and link the account that you used to register as a Windows Insider.


-
Select the type of preview builds you wish to install (Slow releases for our purposes).

-
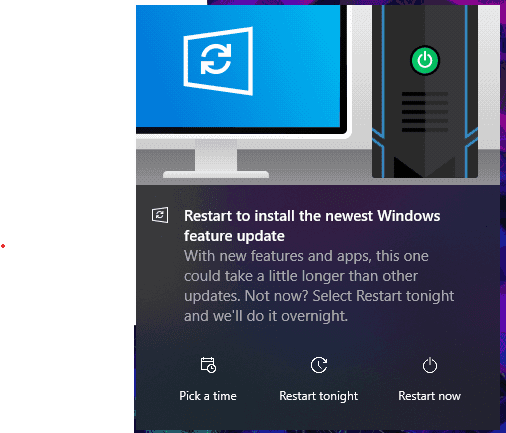
Follow the prompts to complete the setup. You should be asked to restart your computer.

-
Finally, go to Settings > Update & Security > Windows Update and click Check for updates. Windows should now install the appropriate build based off your settings.

After the installation is complete, you can confirm you have an appropriate build of Windows one of two ways. The first option: open a command prompt and execute ver:
- Open a run dialog using
Windows Logo Key + R - Type
cmdand click OK - Type
verand press Enter
Second option:
- Open a run dialog using
Windows Logo Key + R - Type
winverand click Ok
Your build version should be 19041 or higher.
Setup Windows Subsystem for Linux (version 2)
Before you begin, please note that your computer needs to support Hyper-V virtualization.
You can now install WSL using Microsoft's guide or follow the steps below:
-
Open PowerShell as an Administrator
-
Enable WSL:
dism.exe /online /enable-feature /featurename:Microsoft-Windows-Subsystem-Linux /all /norestart -
Enable the Virtual Machine Platform:
dism.exe /online /enable-feature /featurename:VirtualMachinePlatform /all /norestart -
Restart your computer
-
Re-open PowerShell and set the default wsl version to
2.wsl --set-default-version 2 -
You may get a message stating
WSL 2 requires an update to its kernel component. For information please visit https://aka.ms/wsl2kernel. Go to the site, install the kernel component. -
Install Ubuntu. This should install the latest Ubuntu LTS.

-
Launch the
Ubuntuapp and you'll be presented with a bash shell. Linux will finish installing and you'll be prompted to setup a username and password.
-
If you install Ubuntu before installing the WSL 2 update, I believe you'll need to manually set the version to of WSL to use and a conversion will be initiated:
wsl --set-version Ubuntu 2 -
Launch the Ubuntu app again and run updates
sudo apt update && sudo apt upgrade -
If you continue to use the Ubuntu app, I recommend enabling the copy and paste keyboard shortcuts.
- Right-click on the top app bar
- Select
properties - Place a checkmark next to
Use Ctrl+Shift+C/V as Copy/Paste - Click Ok
Install Terminus
I didn't like the Ubuntu app, so I tried a few different terminals and ended up with Terminus. The default theme is pretty nice and the theme and color scheme is configurable.
- Install
Terminus. Once installed it should default to using your default wsl distribution.
Setup Node & Rails
To setup Node and Rails I used a combination of the Go Rails Ruby on Rails installation guide and n-install.
NOTE: Since WSL mounts your Windows drive inside of linux, I found that n-install would not install when I had Node installed within Windows. It would detect the installation and stop. To work around this, I uninstalled Node on Windows, ran n-install inside WSL, and then used nvm-windows to install Node again for the Windows side of things.
-
Install some dependencies:
sudo apt-get install git-core zlib1g-dev build-essential libssl-dev libreadline-dev libyaml-dev libsqlite3-dev sqlite3 libxml2-dev libxslt1-dev libcurl4-openssl-dev software-properties-common libffi-dev -
Install Node using
n-installsudo apt install curl make curl -L https://git.io/n-install | bash cd ~ . .bashrc n --version # 6.5.1 -
Install
yarncurl -sS https://dl.yarnpkg.com/debian/pubkey.gpg | sudo apt-key add - echo "deb https://dl.yarnpkg.com/debian/ stable main" | sudo tee /etc/apt/sources.list.d/yarn.list sudo apt update && sudo apt install --no-install-recommends yarn -
Install
rubyusingrbenvcd git clone https://github.com/rbenv/rbenv.git ~/.rbenv echo 'export PATH="$HOME/.rbenv/bin:$PATH"' >> ~/.bashrc echo 'eval "$(rbenv init -)"' >> ~/.bashrc exec $SHELL git clone https://github.com/rbenv/ruby-build.git ~/.rbenv/plugins/ruby-build echo 'export PATH="$HOME/.rbenv/plugins/ruby-build/bin:$PATH"' >> ~/.bashrc exec $SHELL rbenv install 2.7.1 rbenv global 2.7.1 ruby -v -
Install
bundlergem install bundler -
Configure
gitandGitHub# global git config git config --global color.ui true git config --global user.name "YOUR NAME" git config --global user.email "YOUR@EMAIL.com" # generate an ssh key ssh-keygen -t rsa -b 4096 -C "YOUR@EMAIL.com" # copy the output of the following and setup an SSH key in GitHub cat ~/.ssh/id_rsa.pub # To confirm your SSH key is configured in GitHub ssh -T git@github.com -
Install
Railsgem install rails -v 6.0.2.2 rbenv rehash rails -v -
Install
PostgreSQL# to check what posgresql version is available apt show postgresql # install sudo apt update sudo apt install postgresql postgresql-contrib # start service sudo service postgresql start # create a user and open psql sudo -u postgres createuser your_username -s createdb psql # check status service postgresql status
Setup VS Code
-
Install or open VS Code
-
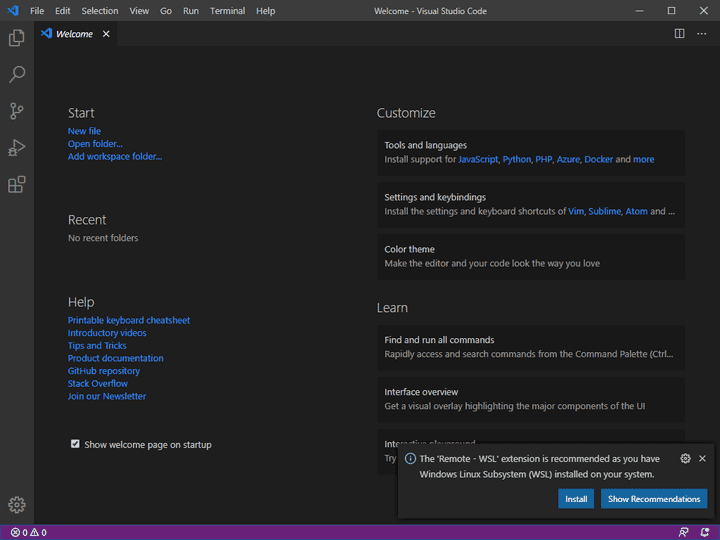
Code will prompt you to install the remote - WSL extension. Click Install.

-
Open a new bash terminal (you may need to close and reopen terminus) and type in
code .
-
When VS Code opens, there will be an indication in the lower left corner that the editor is connected to the code server.

Setup your dotfiles
At Bendyworks we have a set of dotfiles we've named buffet. I've made a few modifications in the last half year to make it work better in Linux and WSL. Feel free to give it a try or use your own preferred dotfile configuration.
git clone git@github.com:bendyworks/buffet.git
cd buffet
./bin/deploy
Setup Windows Node
After configuring WSL, if you'd also like to do Node development strictly within Windows, you can install nvm-windows
My Thoughts on the experience
I've been using it on a daily basis for over a month and I love using WSL. Docker Desktop integrates with WSL. You can view web content served by your rails or node server from your Windows based browsers.
I've only run into a snag while building an Ionic app. Developing the web portion works smoothly. However, WSL doesn't run graphical linux applications. Even if it did, it wouldn't be able to run the android emulator without using a very slow emulation method. I also ran into this issue attempting to run the Android emulator inside a virtualized instance of Ubuntu. To work around this I had to install the Windows version of Android Studio, Gradle, and the Java SDK. I ran into issues building the android project when it was built from within WSL. I had to check out the git repository and generate the android project entirely on the Windows side of things.
Another caveat is that I couldn't run a VirtualBox Virtual Machine (configured without Hyper-v) without disabling Hyper-V system wide. That requires you to restart your computer. This isn't an issue with WSL but a conflict between Hyper-V and VirtualBox being implementations of two different hypervisor types. From my limited amount of research into it, one runs on top of the host system while the other runs alongside it.
In the end, I'd recommend WSL for general Rails and Node development. However, the workflow for building a hybrid mobile app for Android is wonky. And of course, you'll need a Mac and Xcode to build an iOS app anyways.
Image Attributions
The title image for this blog post uses Tux as drawn by Larry Ewing
Republished from bendyworks.com/blog with permission.


